Showing posts with label DIY. Show all posts

Thursday, 7 March 2013

Fabfrocks loves: Caseable. Design your own and discount code!

Hi guys,
How incredible is this case for my iPad, covered in lovely Fabfrocks branding? (Designed by the talented Carly Watts) It's from Caseable, a company that makes custom cases for smartphones, laptops, tablets and e-readers.  photo caseable2_zpsf859f224.jpg You can either upload your own artwork (which is what I did) or choose from the Caseable gallery of images from a great selection of independent artists. You can also choose the colour of the inside and outside of your case, and personalise it even more with text; I added my blog name to the front and blog URL on the back.  photo caseable1_zpsb52eb0f5.jpg  photo caseable3_zps1c48aa5a.jpg I like it so much that I plan on ordering one for my iPhone with a picture of Wilbur on it. Because cliché or not, that's just what mums do! If you have a tech-savvy mum, these would make a great Mothers Day present (Yes it's coming soon, so don't forget to buy a card!) and I'm planning on having one made for my Dads kindle for his birthday: I really am obsessed with them.

For the eco-warriors amongst you, happily the team at Caseable are committed to recycling: they only use recycled polyester in their products, such as their e-Reader and tablet cases, meaning your case is not only unique to you but it also helps conserve resources and save our environment.

They're pretty affordable too: A phone case comes in at £24.90. A tablet case costs £49.90. If you want one of your very own then shop here.

And for the next two weeks they're even cheaper! Simply enter the exclusive Fabfrocks voucher code fabfrocks10 at checkout, and you will receive a whopping £10 off your order!! The code is valid until midnight on 21st March.

Do you have cases for all of your gadgets?  Are you tempted to design your own? I'd love to know what you would put on your case and what your design would look like!

Love Tor xxx

*I received an iPad case for the purpose of this review

Saturday, 15 December 2012

Christmas crafty Saturday: Make the gift wrap part of the present.

Hi guys,
I love getting crafty, and Christmas is the perfect time to exercise my love of all thing craft with a real purpose. So I thought that every Saturday during December I would share one of my seasonal crafts with you guys.

In case you haven't noticed over previous years, I'm going to let you into a little secret. I really really love Christmas. Like I'm obsessed with Christmas! I love decorating our house, buying special presents for everyone I love, I even like writing Christmas cards - I know! I'm crazy! But another one of the things I love (and something I've gotten from my mum) is wrapping my presents, so that they look amazing and leave people excited to open them.

Over the years I've decorated my presents with personalised keyrings, christmas tree ornaments, and candy canes. I've seen gorgeous presents that have been decorated with lollypops, cookie cutters, and even homemade jewellery. When you add something to the top of the present, however small, the wrapping becomes part of the gift.
Photobucket
This year I'm decorating my presents with candy cane mice: felt mice which I'm made by hand and added candy canes to make their tails. You can find the Martha Stewart tutorial on how to make the mice here: note that I stitched mine together rather than using fabric glue recommended by Martha (who knew she was so lazy?!) and they looked much better for it.
Photobucket
Photobucket
For the wrapping paper I've opted for plain metallics or red: I always think if you're going to embellish then the embellishment shows up so much better against the background of plain paper. I also experimented a little with polka dots for that Cath Kidston feel. Other unusual wrapping paper options are to use brown parcel paper and even newspaper: both guaranteed to make your presents stand out when they're underneath the tree!

How do you wrap your Christmas presents? Do you like to make the wrapping into something special, or do you prefer to spend more time on getting the right gift? I wonder if it's part of being a blogger than means I like literally everything I do (even giving a present) to be something that's aesthetically pleasing!

Love Tor xx

PS - Don't forget to enter my Christmas giveaway: there is a great selection of little prizes to be won!! 

Saturday, 8 December 2012

Christmas crafty Saturday: How to make Christmas stockings

Hi guys,
I love getting crafty, and Christmas is the perfect time to exercise my love of all thing craft with a real purpose. So I thought that every Saturday during December I would share one of my seasonal crafts with you guys.

I like to create my own little presents for people, as well as decorations for the house: this year, for the first time, I tried my hand at making a Christmas stocking. It turned out so well that I'm going to show you how I made it so that, if you're feeling so inclined, you can try your hand at making your own:
Photobucket
I kept this really simple and used just two different cotton fabrics, cut out a felt letter, and then ribbons and buttons for the trim. But obviously the only limit to what you can make is your imagination: use velvet, add flowers, diamante, write your name on it with fabric paint. It really is up to you!

You will need:
2 sheets A4 paper to cut the pattern
1/2 meter patterned fabric
1/2 meter plain coloured fabric
Coordinating cotton
Embellishments (I used felt, ribbon, and buttons)
PhotobucketPhotobucket
1. Cut out a stocking template pattern onto your sheets of A4 paper: this will be the template you use to cut your fabric. I drew and redrew mine by hand until I had the shape I wanted.
2. Cut the template 4 times; twice on each of your fabrics. Remember to turn the template around when doing the back panel of the patterned fabric, so the pattern will still show when the stocking is assembled.
3. Place the fabric with the patttern to the inside and the lining to the outside and then stitch the four pieces of fabric together: I used a simple running stitch. If you want to create this even quicker, you could use a sewing machine. Turn inside out and voila: you have your very own simple-to-sew Christmas stocking!
4. Embellish away to your hearts content! And don't forget that if you want to hang your stocking you'll need to add a ribbon loop to the corner.
Photobucket
PhotobucketObviously this one is entirely for my own satisfaction, as the baby will be far too young to appreciate Christmas or stockings. But he'll only get one first Christmas, and I intend to suck as much joy and fun out of it as possible!

So what do you think? Do you think you'll have a go at making your own? If you do, I would LOVE to see how it turns out; email me a picture!

Love Tor x

PS - Don't forget to enter my Christmas giveaway: there is a great selection of little prizes to be won!! 

Friday, 2 November 2012

Fabfrocks at home: The compromise living room

Hi guys,
Well, you've already seen the dressing room and the nursery. Next up on the tour of our new house is the living room. Because the house has a living room and dining room, the room is much smaller than the living/dining combo room we had in the old flat. The affect is that it feels nice and cosy, full of all my favourite things.

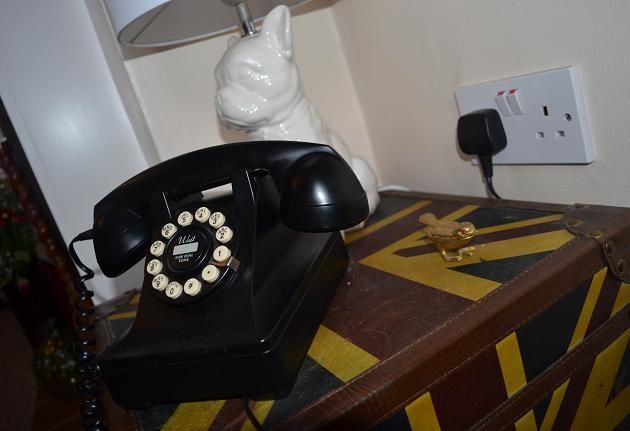
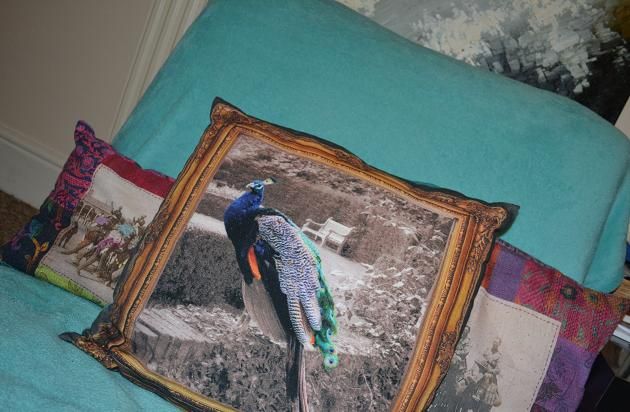
I call our living room a compromise room because Mike and I have such different tastes. He likes things minimalist, and is a huge fan of slick black furniture. Me? Well I'm the complete opposite! I like vintage, colour, and clutter! So our living room is an odd combination of both. Here's how it looks:
Photobucket
Photobucket
Photobucket
Photobucket
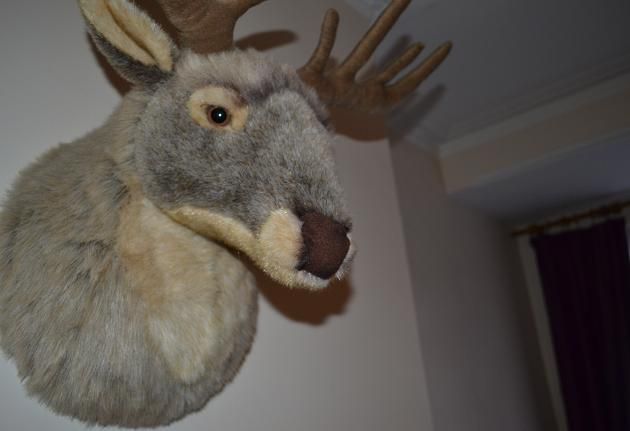
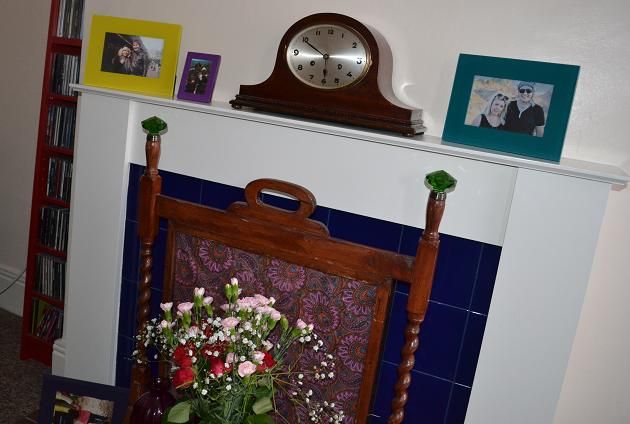
The trunk looks vintage but isn't, it's actually from Homesense. The phone and lamp are both from Debenhams and the little brass bird was a bootsale acquired gift from a friend. We brought the furry stags head back from Berlin (I promise you stuffing this into Mike's rucksack because we were travelling hand-luggage-only was not a highlight of the trip!) The fireguard screen is the newest addition to this room: I got it from a carboot sale for just £1, where it needed some serious work. We scrubbed it clean, replaced the fabric inside the body of the screen and new jewelled knobs for the top (these are just ordinary doorknobs from B&Q, but they serve exactly the same purpose!)

We're renting this place (we're hoping to buy early next year) so we're reluctant to paint or do any extensive refurbishment to the living room: renting and injecting personality is hard! But I do like this room: it's so cozy and just perfect for snuggling up warm in when it's cold outside.

Do you have to compromise in your house? Do you have different tastes from your partner/housemates and how do you make it work?

Love Tor xx

Wednesday, 11 August 2010

My vintage charms: Make your own jewellery

Have you ever been looking for a piece of jewellery to go with an outift, but nothing in the shops is quite right? Or wanted to wear a piece of jewellery that you know you won't see on anyone else? There's nothing nicer than that feeling that something you've wearing is unique to you. And I also love the feeling of having made something myself: I make a lot of my own headbands, and am always taking charms off old necklaces to make new ones.
Photobucket
I found this website called my vintage charms where you can buy all manner of charms perfect for making DIY jewellery: they're divided into categories such as circus, wonderland, paris, oz, and many more. They also sell the chains (which are only 65p each) and fastenings to secure your charms to your necklace. Another idea I love is to just thread the charms onto ribbon for a cutesy homemade feel. (I always get carried away when there's DIY to be done!)
Photobucket
I've ordered lots of stuff from the Alice collection to make personalised necklaces for each of my hens on my hen 'do: i'm also stitching little pouches to put each necklace in. I think it's a much better gift than the usual pile of plastic willies you usually get at these things!!

They're really easy to make (you can even simplify it further by threading the charms straight onto the chain without using the jumprings, with no extra work) and the charms are pretty inexpensive too: by making them yourself your necklaces will be much cheaper than by buying them from the highstreet! You could also use all of the charms to make bracelets, and even earrings: a little bit of creativity and a few pounds spent, and the world is your oyster. (That's the jewellery world of course, not the whole world, which I think is a little more expensive!) I can't wait for my supplies to arrive and get started: i'll show you what I make!

Love, Tor xx

Monday, 24 August 2009

Daily wear: Big shoulders!

I picked up this dress from Oxfam: it fell to my ankles and buttoned up to the neck, but I loved the ditzy floral pattern, so I diy'ed all over it! I changed the buttons to these cute gold sailor numbers, lowered the neckline to a deep v and cut of the hem. The hem looks a little wonky when you look at it close up, but it isn't tooo noticable! I decided not to remove the shoulder pads because I liked the boxy shape they gave to my upper body: a nod to this season's 80s trend, but on my terms!
.
I teamed it with a vintage cream handbag (which is sadly starting to fall to pieces and I have to be verry careful with it) topshop white gladiators with gold studs and my black and gold aviators. I feel good in this outfit, which lulls me into believing this could be a good day too!
.
Happy Monday everyone!
.
Love, Tor xx

Monday, 6 July 2009

Anything TRAID can do....

...Oxfam can try to do better! Back in May I wrote about TRAID's remake and reuse workshops, and what a good idea I thought they were (i'm trotting off to one next month actually!) but it seems that Oxfam have seen their good idea, and taking it a step further!
.
Oxfam is introducing a new competition inviting the public to create their own customised garment from old clothing or recycled materials and have it judged by renowned British stylist Mrs Jones. For Oxfam DIY's new online fashion resource, entrants are invited to use materials from their own wardrobe or an Oxfam store and submit a photo of their customised item, modelled by themselves or a friend, to the competition page on Flickr. The winning designer will have a one-of-a-kind item created especially for them by Mrs Jones. The top five shortlisted designs will be featured on the Oxfam DIY website.
.
To give us all inspiration, Mrs Jones created 30 unique pieces, modifying clothes she found in Oxfam stores:
That incredible jumpsuit was a shirt with the sleeves making the legs and the collar turned into pockets!
.
Ethical, sustainable, a lot of fun, and there's a chance of winning a prize?? Count me in -I have a wardrobe full of old clothes and this could well have inspired me to get creative!
Find out more on the Oxfam website.
.
Love, Tor x

Thursday, 11 June 2009

Daily wear and DIY

Hey folks,
So for once i'm going to do without the rambling intro and just get straight to it. This is the outfit I am wearing today:
Blouse: Urban outfitters
Dress : Primark
Bracelet and ring: Topshop
Shoes: Boutique in Florida
Necklace: I made it myself

Oh yeah, looking snazzy right? And the hayfever eyes and puffy hayfever face make me look even more attractive, no? This daily wear interlude brings me nicely to the DIY section of this post in a "here's one I made earlier" Blue Peter from the 90s (do they still do here's one i've made earlier?) kind of way!
I fell in love with a necklace the wonderful Tavi was wearing on her blog once upon a time, so I decided to make my own (albeit no doubt not as professional) version!
It looks pretty good, no? I was aiming to make a longer one, but I forgot to take into account that plaiting the fabric would mean it would end up shorter! I had another go at making a longer one last night though- I loved the grey one, and I had loads of fabric left over, so I repeated the whole procedure with a lot more plaiting!

If you're looking at this and thinking "hey, that looks pretty simple, I could definitely give that a go!" then here are the instructions on how I threw it together in four simple steps.

1. Cut 6 lengths of fabric about 2/2.5 inches wide (depending how thick you want your necklace) and as long as you want the necklace to be (remember to allow for "shrinkage" when you start plaiting! I went for a jersey fabric to start with, because I thought the stretch would make it easier to plait
2. Roll one piece of fabric around another, creating a long thick fabric "sausage" and leaving you with 3 lengths of fabric to plait (I not Anonymous Agent sometimes plaits 4 pieces of fabric and i'm going to try that, but for simplicity I started with three!)
3. Secure the material at one end (I created a loop) and plait!
4. Attach the two ends together to make a necklace. I threaded the finished end through the loop and secured with a couple of stitches (the cheap option!) but if you want it to look really fancy maybe you could buy a clasp and attach the ends to that? And voila! Your finished!


And, to complicate it a little bit more, in traditional FabFrocks style, here is an awful diagram, drawn in paint!

I love how this simple necklace looks, and I love that it's DIY I can do in around half an hour (my crafting attention span, sadly!) I suspect one in every colour of the rainbow making it's way to my wardrobe some time soon!


Love, Tor x

Thursday, 28 May 2009

Another summer day out idea: I feel like Blue Peter!

Cast your mind back to the shadowy world of December 2007, when I wrote about the importance of textile recycling AKA why I loved shopping in TRAID, A segment of which I noticed during the course of my research for this piece actually appears on the TRAID website!

Now roll yourselves forward to today (hello, welcome back!) because i'm going to do it again!

This year is TRAID's tenth year (happy birthday!) and continuing with this weeks theme of things to do throughout the summer, TRAID is running free remaking and reuse workshops in London throughout 2009.
.
Simply bring a garment that you no longer wear and the TRAID team will help you to transform that damaged jacket, dated skirt or unspeakable fashion mistake into a gorgeous and completely unique piece of clothing. As well as learning easy clothes remaking skills and basking in the glow of having made something yourself, you will also make your clothing last longer - reducing waste and diverting textiles from landfill.
.
I think this is a genuinely ruddy marvellous idea! Although I keep making pathetic attempts at DIY at home, it will be great to have a TRAID expert show me how to do it better - and all for free!! I have a battered denim jacket that I will be taking down - I tried to do the jemstone epillettes make and do in UK Vogue on it this month , but it just looks like Dolly Parton threw up on my shoulders!
.
So, as the Loreal advert always says, here is the science bit:
.
When:
2009 // 11am - 3pm // 30 May, 27 June, 25 July, 22 August, 26 Sept, 31 Oct, 29 Nov
Where:
All workshops take place at TRAID Shepherds Bush shop 154 Uxbridge Road, W12,
Contact:
Lyla Patel at TRAID on 020 8733 2591 or email her to register your interest. You can also just turn up on the day!!
.
I've got the 27 June and the 25 July ones pencilled into my diary (so I can definitely go to one!) Hopefully I'll see you there!
.
Love, Tor x

Thursday, 8 January 2009

And the DIY begins..

As I mentioned in a previous post, I was gifted a sewing machine from my wonderful parents for Christmas. I've been wanting one for ages, and am really excited about it! However, what I didn't mention previously is that I have no idea how to use it!

But since when did a little thing like skill get in the way of ambition: with a little determination and lots of failed attempts no doubt, i'm sure i'll be making dresses in no time. And to help me on my way i've discovered a wonderful website; http://www.burdastyle.com/ The site has free patterns, how to guides, forums, and is fantastic for novices like me as each task is given a difficulty rating from 1-5, and as long as you follow the simple steps, some of the grade 1's have proven quite achievable.
Here's what i've made so far:

The fabric flower is more of an embellishment than a bonafide project, but it only took about 10 minutes to do and I think it looks really great. I think 6-7 of these on the shoulder of a plain white tshirt would be perfect for the summer.

Draw string bag; it really is the simplest thing to sew isn't it? OK, so they aren't the kind of thing you need all the time. Or in fact, ever, but at least now I know I can officially stitch a straight line on my fabulous sewing machine. And i'm using the bag in my sewing box to hold all my buttons.

Excuse the not exactly fashion forward fabric of my upcoming DIY attempts by the way: whilst i'm still practicing, i'm using old pillow cases and any other scraps of free fabric I can lay my hands on. As soon as I feel a little more confident it will be silk and lace and lux galore!

Next on my hit list is a dress and a cape: awarded 1 and 2 stars respectively, they should prove an achievable challenge...I hope. I realise I won't be making them in the 1-3 hours suggested, but I've downloaded the patterns which i'm busy sizing patiently, and my sister and I are hitting John Lewis tonight to choose the fabric. Hopefully by the end of the month I will have something to show you for my efforts that looks a little like this:
(These are the patterns i'm using by the way. I know you know what a dress and a cape look like)
Wish me luck!
Tor